

Mastering the Art of Shed Roof Repairs: Your Ultimate Guide to a Leak-Free Shelter
Are you tired of dealing with pesky leaks and water damage in your shed due to a faulty roof? Look no further, as we present to you the ultimate guide on mastering shed roof repairs. From addressing minor leaks to complete roof overhauls, this comprehensive guide will equip you with the knowledge and skills needed to keep your shelter leak-free and secure.
Whether you’re a seasoned DIY enthusiast or a novice in home repairs, this guide caters to all skill levels. Say goodbye to water stains, mould growth, and structural damage caused by a compromised roof. We delve into the intricacies of shed roof maintenance, providing you with practical tips, step-by-step instructions, and expert advice to ensure your shelter withstands the harshest weather conditions.
Get ready to elevate your shed maintenance game, save on costly repairs, and enjoy a dry and functional outdoor space. Let’s dive into the art of shed roof repairs and transform your shelter into a durable and reliable haven.

Understanding Shed Roof Repairs
Shed roof repairs are a crucial aspect of maintaining the integrity and functionality of your outdoor storage space. A shed is often subjected to various weather conditions, from torrential rains to heavy snowfall, which can contribute to wear and tear over time. Understanding the fundamentals of shed roof repairs allows you to identify issues early and take appropriate action, ensuring your shed remains a reliable storage solution. Whether you have a flat roof or a pitched roof, the principles of repair can vary significantly, highlighting the need for tailored approaches depending on your shed’s design.
The primary goal of shed roof repairs is to prevent water infiltration that can lead to mold growth, rot, and significant structural damage. Familiarizing yourself with the components of your shed roof, including rafters, decking, and roofing materials, is essential. Each part plays a role in the overall performance of the roof, and understanding how they work together can help you pinpoint vulnerabilities. Regular inspections and maintenance can extend the life of your roof and save you from costly repairs down the line.
Additionally, it’s important to stay informed about the latest roofing materials and technologies. Advancements in waterproofing membranes, underlayment types, and roofing shingles can enhance your roof’s resilience against leaks. Investing time in learning about these options will empower you to make informed decisions when repairing or upgrading your shed roof. Ultimately, mastering the art of shed roof repairs not only protects your belongings but also enhances the longevity of your outdoor storage space, making it a worthwhile endeavour.
Signs of a Leaky Shed Roof
Detecting a leaky shed roof early can save you from extensive damage and costly repairs. One of the most apparent signs is water stains on the interior walls or ceiling of the shed. These stains often appear as dark spots or discolouration, indicating that moisture is seeping through the roof. If left unnoticed, these stains can lead to mould growth and further deterioration of the shed’s structural components. Regularly inspecting the inside of your shed, especially after heavy rainfall, can help you catch these signs early.
Another indicator of a leaking roof is the presence of dampness or musty odors inside the shed. If you notice that your tools or stored items feel damp or develop an unpleasant smell, it may be a sign that water is infiltrating the space. This is particularly concerning if you store sensitive items like electronics, paper products, or furniture that can be easily damaged by moisture. Ensuring a dry environment inside your shed is essential to maintaining the condition of your stored belongings.
Additionally, inspecting the exterior of your shed can reveal signs of a compromised roof. Look for missing or damaged shingles, cracks in the roofing material, or sagging areas that indicate structural issues. If you notice any of these problems, it’s crucial to address them promptly to prevent leaks from developing. Regular exterior inspections, especially after severe weather events, will help you keep your shed in top condition and prevent minor issues from escalating into significant repairs.
Common Causes of Shed Roof Leaks
Understanding the common causes of shed roof leaks is vital for effective maintenance and repair. One of the leading culprits is poor installation or aging roofing materials. If the roof was not installed correctly, it may lack the necessary slope to allow water to drain effectively, leading to pooling and eventual leaks. Furthermore, older roofs are more susceptible to degradation, making them more prone to leaks over time. Regular inspections can help you identify these issues before they become major problems.
Another significant cause of leaks is damage from environmental factors. Extreme weather, such as heavy winds, hail, or snow accumulation, can compromise the integrity of your shed roof. For instance, strong winds can lift shingles or tiles, while heavy snow can create excessive weight that stresses the roof structure. Additionally, branches from nearby trees can fall and puncture the roofing material, leading to leaks. Taking preventive measures, such as trimming overhanging branches, can mitigate these risks.
Clogged gutters and downspouts are often overlooked but can also contribute to roof leaks. When gutters become blocked with leaves and debris, water can overflow and pool around the base of the shed, eventually making its way into the roofing system. Ensuring that gutters are cleaned regularly will help direct water away from the shed and reduce the risk of leaks. By being aware of these common causes, you can implement targeted maintenance strategies to protect your shed roof.
Tools and Materials Needed for Shed Roof Repairs
Having the right tools and materials at your disposal is essential for successful shed roof repairs. Start by gathering basic hand tools such as a hammer, screwdrivers, and a utility knife. These tools are fundamental for removing damaged roofing materials and securing new ones. A pry bar can also be useful for lifting shingles or tiles without causing additional damage. For more extensive repairs, a power drill may be necessary to drive screws into the roofing structure effectively.
In addition to hand tools, you will need safety equipment to ensure a safe working environment. A sturdy ladder is crucial for accessing the roof safely, while a harness can provide added security if you’re working at significant heights. Don’t forget to wear gloves to protect your hands from sharp materials and safety goggles to shield your eyes from debris. Safety should always be your top priority when undertaking roof repairs to avoid accidents and injuries.
When it comes to materials, you’ll need to select the appropriate roofing material for your shed. This could include asphalt shingles, metal sheets, or rubberized roofing membranes, depending on your shed type and your personal preference. Additionally, you’ll require roofing nails, flashing, and sealants to ensure a watertight installation. By preparing your toolkit and gathering the necessary materials beforehand, you can streamline the repair process and tackle your shed roof issues efficiently.

Steps to Repair a Shed Roof
Repairing a shed roof involves a systematic approach to ensure all issues are addressed effectively. Start by conducting a thorough inspection to identify the specific areas that require repair. Look for damaged shingles, leaks, or any structural weaknesses that may compromise the roof’s integrity. Once you’ve pinpointed the problem areas, make a plan for the repairs needed and gather all necessary tools and materials.
The first step in the repair process is to remove the damaged roofing material. Use a utility knife to cut away any compromised shingles or tiles, being careful not to damage the underlying structure. If you encounter layers of roofing material, it’s essential to remove them all to ensure a proper seal with the new materials. After removing the damaged sections, inspect the underlying decking for rot or deterioration, replacing any affected areas as needed.
Once the damaged material is removed and the underlying structure is repaired, it’s time to install the new roofing. Begin by laying down a waterproof underlayment, which acts as an additional barrier against moisture. Next, install the new shingles or roofing material, ensuring they overlap correctly to prevent water intrusion. Secure each piece with roofing nails, and apply flashing around any vents, chimneys, or other protrusions to create a watertight seal. Finally, inspect your work and ensure that all seams and edges are sealed properly, providing a robust defense against leaks.
Preventative Maintenance for Shed Roofs
Preventative maintenance is key to prolonging the life of your shed roof and avoiding costly repairs. One of the most effective strategies is to conduct regular inspections, ideally at least twice a year, to identify any potential issues before they escalate. During these inspections, check for signs of wear, such as cracked shingles, rust on metal roofs, or loose flashing. Early detection of these problems allows you to address them promptly, preventing further damage.
Cleaning gutters and downspouts is another essential aspect of preventative maintenance. Clogged gutters can cause water to overflow and pool around the base of your shed, leading to leaks and structural issues. Make it a habit to clear gutters of leaves, twigs, and other debris regularly, especially in the fall when leaves tend to accumulate. Installing gutter guards can also reduce the amount of debris that enters your gutters, making maintenance easier.
Additionally, consider applying a protective sealant to the roof surface. This can help repel water and prevent UV damage to the roofing material, extending its lifespan. Depending on the roofing type, you may also want to install a roof coating that adds an extra layer of protection against the elements. By implementing a routine maintenance schedule and taking proactive measures, you can significantly enhance the durability of your shed roof and enjoy peace of mind, knowing it’s less likely to develop leaks.
DIY vs. Professional Shed Roof Repairs
When it comes to shed roof repairs, you may find yourself weighing the benefits of DIY versus hiring a professional. Tackling the repairs yourself can be a rewarding experience, especially if you enjoy hands-on projects and have some basic construction skills. DIY repairs often save money on labour costs and allow you to work at your own pace. Additionally, completing the work yourself can give you a sense of accomplishment and a deeper understanding of your shed’s structure.
However, it’s important to recognize the limitations of your skills and the complexity of the repairs needed. If the roof damage is extensive or involves complicated structural issues, it may be wise to consult a professional. Experienced roofers have the expertise to identify underlying problems that may not be immediately visible and can ensure that the repair is performed to industry standards. Hiring a professional can also save you time and reduce the risk of accidents or errors that could lead to further damage.
Ultimately, the decision between DIY and hiring a professional depends on your comfort level with home repairs, the severity of the damage, and your available time and resources. If you choose to go the DIY route, make sure to research thoroughly and follow safety guidelines. Conversely, if you decide to hire a professional, take the time to find a reputable contractor with experience in shed roof repairs to ensure quality work.
Cost Considerations for Shed Roof Repairs
Understanding the costs associated with shed roof repairs is essential for budgeting and planning your maintenance efforts. The overall cost will depend on several factors, including the size and pitch of the roof, the extent of the damage, and the type of materials used for repairs. On average, basic repairs can range from a few hundred to several thousand dollars, depending on these variables. It’s crucial to get multiple quotes from contractors to ensure you’re receiving a fair price for the work needed.
Another consideration is whether you will be repairing the roof yourself or hiring a professional. DIY repairs can significantly reduce labour costs, but you must still account for the materials and tools required for the project. If you lack experience, mistakes can lead to additional expenses, so carefully assess your skills before deciding to tackle the job alone. Investing in quality materials upfront can also save you money in the long run by extending the lifespan of your repairs.
Additionally, consider the potential costs of neglecting roof repairs. Allowing leaks to persist can lead to serious structural damage, mold growth, and damage to stored items within your shed. These issues can escalate quickly, resulting in far more expensive repairs than addressing the problem early on. By understanding the costs associated with both immediate repairs and long-term maintenance, you can make informed decisions that protect your shed and your budget.
Shed Roof Repair Safety Tips
Safety should always be a top priority when performing shed roof repairs. Working at heights can be dangerous, so it’s essential to use proper equipment and techniques to minimize risks. Start by using a sturdy, stable ladder that is appropriate for the height of your shed. Make sure the ladder is placed on level ground and secured to prevent it from slipping. If you’re working on a steeply pitched roof, consider using a harness and safety rope for additional protection.
Wearing appropriate safety gear is crucial to protect yourself from potential hazards. Hard hats can safeguard your head from falling debris, while safety goggles will protect your eyes from dust and small particles. Gloves are essential for hand protection, especially when handling sharp materials like shingles or metal sheets. Additionally, consider wearing non-slip footwear to enhance your grip while navigating the roof surface.
Before beginning any repair work, ensure that the weather conditions are safe. Avoid working on the roof during heavy winds, rain, or storms, as these conditions can increase the risk of accidents. It’s also wise to have a helper on hand whenever possible, as they can provide assistance and support in case of an emergency. By prioritizing safety and taking necessary precautions, you can reduce the likelihood of accidents and enjoy a successful repair process.
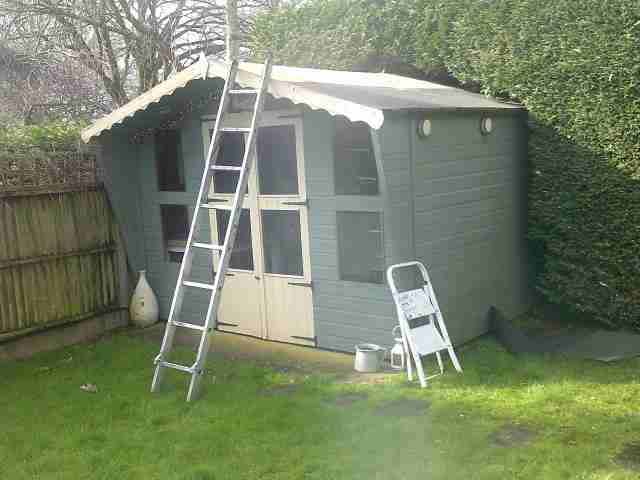
Conclusion: Enjoying a Leak-Free Shelter
In conclusion, mastering the art of shed roof repairs is an invaluable skill that can lead to a durable, leak-free shelter for your belongings. By understanding the signs of a leaky roof, common causes of damage, and the tools and materials required for repairs, you can take proactive measures to maintain your shed. Regular inspections and preventative maintenance play a crucial role in prolonging the life of your roof, ensuring that minor issues are addressed before they escalate.
Whether you choose to tackle repairs yourself or hire a professional, being informed about the costs and safety considerations will help you make the best decisions for your situation. Ultimately, a well-maintained shed roof not only protects your stored items but also enhances the overall value and functionality of your outdoor space.
Embrace the knowledge and skills you’ve gained from this guide, and take the first steps towards enjoying a leak-free shelter. With proper care and attention, your shed can remain a reliable haven for years to come, free from the worry of leaks and water damage. Take pride in your shed maintenance efforts, knowing that you have the tools to ensure its longevity and reliability.
